Here we will be showing how to create a simple object and to make it move. To do this we will first need to make a simple object that we would wish to create. Below is a picture I drew in 3.5 seconds, its a 20×20 pixel png image named “object.png”. Note: All asset names need to be lower-cased.
First we should add a little structure to this object, such as its location and speed, however we do wish to create multiple, so writing a whole new one every time would be a pain. Thus we will create an class to form a sort-of blueprint for all of the objects. The class you will need is the following:
 1
 2
 3
 4
 5
 6
 7
 8
 9
10
11
12
13
14
15
16
17
18
19
20
21
22
23
24
|
 //This is our "class" which defines our object "MyObject" that we will be creating
    public class MyObject{
        //Creates the Texture or image of our object
        private Texture myTexture = new Texture("object.png");
        //Gets X location of the courser upon spawning, corrects x loc to be in middle of cursor
        private int xLoc = Gdx.input.getX() - 10;
        //Gets Y location of the courser upon spawning, corrects y loc to be in middle of cursor
        private int yLoc = Gdx.input.getY() + 10;
        //Defines variables to store the Velocity
        private int xSpeed;
        private int ySpeed;

        //This relieves the random velocity given to the object upon creation
        public MyObject(int xspeed, int yspeed){
            //Sets the velocity sent to it, to the variables defined above
            this.xSpeed = xspeed;
            this.ySpeed = yspeed;
        }
        //This updates the location of our object by adding the speed of each direction to the current location
        public void Update(){
            this.xLoc += xSpeed;
            this.yLoc += ySpeed;
        }
    }
|
Note: You must add either my object our your own object into the assets folder in the android project. The same location as the default “badlogic.jpg”. If you are having issues loading the file into the assets folder, try right clicking the assets folder to open in explorer, you can then drag and drop the file into the assets.
Now that we have the backbones for creating our object, lets get to the actual process of creating/spawning them upon clicking the screen. To do this, we will need to take two steps: 1) keeping track of all of our objects and 2) spawning them upon being clicked. For the first step we will create an Array that is designed for our object, this will store all of objects so we can access them easily:
1
2
|
    //Creates and array to hold all of our objects
    private Array myObjectArray = new Array<MyObject>();
|
Then you are going to put the following code within the Render(float deltaTime) portion:
1
2
3
4
5
6
7
|
//Code snippet that runs when being touched
        if(Gdx.input.isTouched()){
            //Creates a new Object (which is our moving thingies) with a random x and random y speed
            MyObject myObject = new MyObject(MathUtils.random(-5,5),MathUtils.random(-5,5));
            //Adds our new created object to our object array
            myObjectArray.add(myObject);
        }
|
Now we are creating an object, with a random velocity, and adding into our array that holds all of the objects. Now we will wish to sort through all of the objects and update them allowing with drawing them onto the screen. This portion will also go into the Render(float deltaTime) portion:
 1
 2
 3
 4
 5
 6
 7
 8
 9
10
11
|
//Creates an iterator what will sort through objects of the from of "MyOjbect"
        Iterator<MyObject> rectIter = myObjectArray.iterator();
        //This runs through each object in the iterator
        while(rectIter.hasNext()){
            //sets the current object to a new myObject
            MyObject myObject = rectIter.next();
            //updates the current object that it is controlling
            myObject.Update();
            //Draws the current object onto the screen
            game.gameBatch.draw(myObject.myTexture, myObject.xLoc, (480-myObject.yLoc));
        }
|
And that is it! You can also add a little X,Y, coordinate transcriber if you wish to the top left of the screen by the following code:
1
2
|
//Displays x and y cursor position
        game.gameFont.draw(game.gameBatch, "X: " + Gdx.input.getX() + "  Y: " + (480 - Gdx.input.getY()),0,480);
|
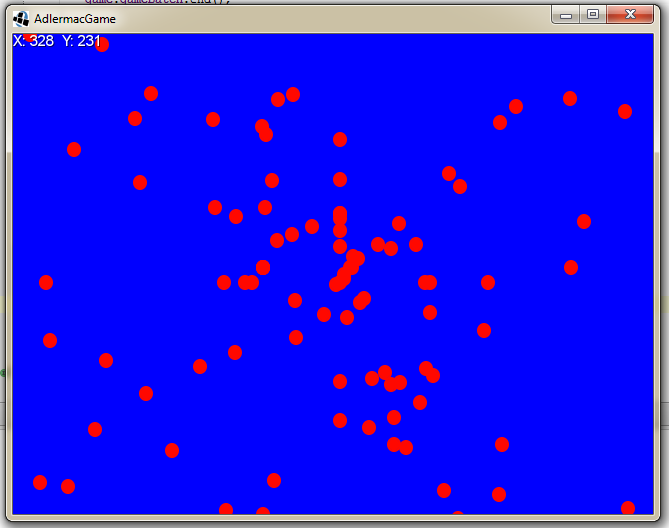
And we are done! You should have something that hopefully functions as such:
Also, the entire class is shown below if you wish:
  1
  2
  3
  4
  5
  6
  7
  8
  9
 10
 11
 12
 13
 14
 15
 16
 17
 18
 19
 20
 21
 22
 23
 24
 25
 26
 27
 28
 29
 30
 31
 32
 33
 34
 35
 36
 37
 38
 39
 40
 41
 42
 43
 44
 45
 46
 47
 48
 49
 50
 51
 52
 53
 54
 55
 56
 57
 58
 59
 60
 61
 62
 63
 64
 65
 66
 67
 68
 69
 70
 71
 72
 73
 74
 75
 76
 77
 78
 79
 80
 81
 82
 83
 84
 85
 86
 87
 88
 89
 90
 91
 92
 93
 94
 95
 96
 97
 98
 99
100
101
102
103
104
105
106
107
108
109
110
111
112
113
114
115
116
117
118
119
120
121
122
123
124
125
126
127
128
129
130
131
132
133
134
135
|
package com.mygdx.adlermac;

import com.badlogic.gdx.Gdx;
import com.badlogic.gdx.Screen;
import com.badlogic.gdx.graphics.GL20;
import com.badlogic.gdx.graphics.OrthographicCamera;
import com.badlogic.gdx.graphics.Texture;
import com.badlogic.gdx.math.MathUtils;
import com.badlogic.gdx.utils.Array;

import java.util.Iterator;

public class MainMenuScreen implements Screen {

    //creates a placeholder for the game we are passing (Switch AdlermacGame to name of your Game Class!)
    private AdlermacGame game;

    //Defining the camera to be used
    private OrthographicCamera camera;

    //Creates and array to hold all of our objects
    private Array myObjectArray = new Array<MyObject>();

    //called upon bein set as a screen (Switch AdlermacGame to name of your Game Class!)
    public MainMenuScreen(AdlermacGame game){
        //assigns the game we passed to the placeholder
        this.game=game;
        //creates the camera
        camera = new OrthographicCamera();
        //Sets the screen to be 800 width by 480 height
        camera.setToOrtho(true,800,480);
    }

    //this is called every time the game is rendered
    @Override
    public void render(float deltaTime){
        //Sets the color to be applied after clearing the screen (R,G,B,A)
        Gdx.gl.glClearColor(0,0,255,1);
        //Clears the screen
        Gdx.gl.glClear(GL20.GL_COLOR_BUFFER_BIT);

        //updates camera view
        camera.update();

        //If you have do not have gameBatch stated in your Game class, you must call:
        //SpriteBatch gameBatch = new SpriteBatch();
        //and then replace all "game.gameBatch" with just "gameBatch"
        //initiates the SpriteBatch from the main Game class
        game.gameBatch.begin();

        //Code snippet that runs when being touched
        if(Gdx.input.isTouched()){
            //Creates a new Object (which is our moving thingies) with a random x and random y speed
            MyObject myObject = new MyObject(MathUtils.random(-5,5),MathUtils.random(-5,5));
            //Adds our new created object to our object array
            myObjectArray.add(myObject);
        }

        //Creates an iterator what will sort through objects of the from of "MyOjbect"
        Iterator<MyObject> rectIter = myObjectArray.iterator();
        //This runs through each object in the iterator
        while(rectIter.hasNext()){
            //sets the current object to a new myObject
            MyObject myObject = rectIter.next();
            //updates the current object that it is controlling
            myObject.Update();
            //Draws the current object onto the screen
            game.gameBatch.draw(myObject.myTexture, myObject.xLoc, (480-myObject.yLoc));
        }

        //displays the deltaTime
        System.out.println("deltaTime: " + deltaTime);
        //shows what the Frames Per Second is
        System.out.println("FPS: " + 1f/deltaTime);
        //Displays x and y cursor position
        game.gameFont.draw(game.gameBatch, "X: " + Gdx.input.getX() + "  Y: " + (480 - Gdx.input.getY()),0,480);
        //ends the SpriteBatch
        game.gameBatch.end();
    }

    //This is our "class" which defines our object "MyObject" that we will be creating
    public class MyObject{
        //Creates the Texture or image of our object
        private Texture myTexture = new Texture("object.png");
        //Gets X location of the courser upon spawning, corrects x loc to be in middle of cursor
        private int xLoc = Gdx.input.getX() - 10;
        //Gets Y location of the courser upon spawning, corrects y loc to be in middle of cursor
        private int yLoc = Gdx.input.getY() + 10;
        //Defines variables to store the Velocity
        private int xSpeed;
        private int ySpeed;

        //This relieves the random velocity given to the object upon creation
        public MyObject(int xspeed, int yspeed){
            //Sets the velocity sent to it, to the variables defined above
            this.xSpeed = xspeed;
            this.ySpeed = yspeed;
        }
        //This updates the location of our object by adding the speed of each direction to the current location
        public void Update(){
            this.xLoc += xSpeed;
            this.yLoc += ySpeed;
        }
    }

    @Override
    public void resize(int width, int height){

    }

    @Override
    public void show(){

    }

    @Override
    public void hide(){

    }

    @Override
    public void pause(){

    }

    @Override
    public void resume(){

    }

    @Override
    public void dispose(){

    }
}
|
Bonus: If you notice after you add a lot of the objects, the FPS of the game will slow down considerably. Which is not surpising given how many we are spawning and it is trying to keep track of. Thus, we can dynamically remove all of the objects that happen to off of the screen by altering the existing Iterator code to the following:
 1
 2
 3
 4
 5
 6
 7
 8
 9
10
11
12
13
14
15
|
 //Creates an iterator what will sort through objects of the from of "MyOjbect"
        Iterator<MyObject> rectIter = myObjectArray.iterator();
        //This runs through each object in the iterator
        while(rectIter.hasNext()){
            //sets the current object to a new myObject
            MyObject myObject = rectIter.next();
            //updates the current object that it is controlling
            myObject.Update();
            //Removes object if off screen
            if(myObject.xLoc > 800 || myObject.xLoc < 0 || myObject.yLoc < 0 || myObject.yLoc > 480){
                rectIter.remove();
            }
            //Draws the current object onto the screen
            game.gameBatch.draw(myObject.myTexture, myObject.xLoc, (480-myObject.yLoc));
        }
|
