Skip to content
Menu
The Renaissance Raven
  • Game Development
    • Project 1 – ???
    • Unity Tutorials
  • Electronics and Programming
  • Leisure
  • Blog
The Renaissance Raven

*libGDX* Creating the Map or Platform – Tiled

To create the map that will be used in the game, we use an amazing free open source program called Tiled. You are able to download it from here:

http://www.mapeditor.org/

Open opening this browser, you are able to create a new map. For mine i kept the tile size at 32, and made the map 25×15 as to keep the total pixel size as 800×480 so no screen resizing would be needed in our 800×480 size game. For the tile layer format, Base64 zlib is recommended as the best for tmx maps to use withing libGDX.

Open creating the new map you are exposed to the following:

Tiles – Simply a graphic you can use to build your map. These can be easily made in paint as I do, or very nice royalty free ones are available online.
Layers – These are you layers in to which you can add different tiles, such as a pathways/walls/traps, any kind of tile type that you would wish to distinguish from others.

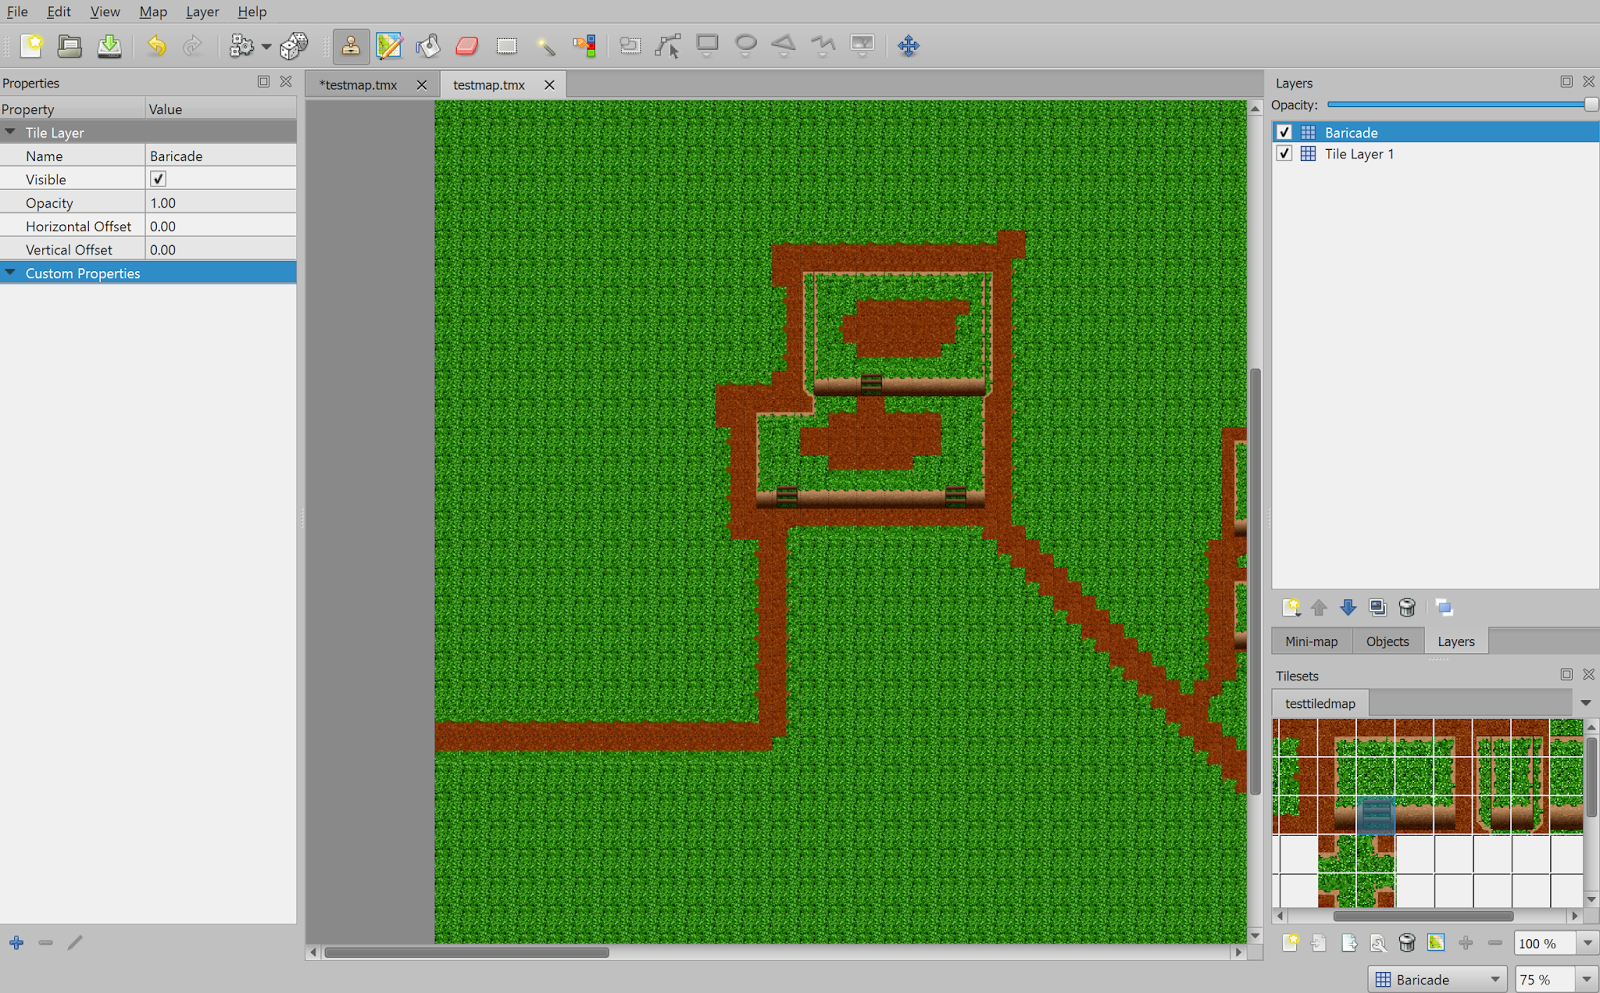
Now simply just click the tile from tile set and add it to the map as your heart desires, to achieve a result such as the following with two layers of “pathway” (mine is called Tile Layer 1) and “barricade”:

And then it is as simple as that, your map is created.

Now to add it to the game the following must be done in addition to adding the tiled map into your assets folder. In your main class (e.g. GameScreen) which renders the game, you must define two new variables:

1
2
3
4
5
    //Creates a reference for our tiled map
private TiledMap tiledMap = new TmxMapLoader().load("testmap.tmx");

//creates a reference for our tiledmaprenderer whichs loads are tiled map
private OrthogonalTiledMapRenderer mapRenderer = new OrthogonalTiledMapRenderer(tiledMap);

Then in the render section, this code will cause the map to be rendered, along with an optional code to center the camera around your character’s location (you will have to create the character class in order to copy this):

 1
2
3
4
5
6
7
8
9
10
11
12
13
//makes the camera fit onto the available screen
game.gameBatch.setProjectionMatrix(camera.combined);
//sets the map renderer to display in the camera
mapRenderer.setView(camera);
//renders the map
mapRenderer.render();

//If you wish for the camera to follow to character
camera.position.x = character.charPosition.x;
camera.position.y = character.charPosition.y;

//updates camera view
camera.update();

Leave a Reply Cancel reply

Your email address will not be published. Required fields are marked *

Recent Posts

  • Project Hasseu – Tutorial 2 – Programming Sentry Turrets
  • Project Hasseu – Tutorial 1 – Programming a machine gun / projectile launcher
  • Project 1 – Update 3
  • Unity – Adding text above game objects without canvas
  • Book Review – A Theory of Fun for Game Design by Raph Koster.

Recent Comments

    Archives

    • February 2021
    • January 2021
    • September 2020
    • August 2020
    • March 2020
    • February 2020
    • April 2017
    • March 2017
    • August 2015
    • July 2015
    • June 2015
    • March 2015
    • February 2015

    Categories

    • Reading
    • Uncategorized

    Meta

    • Log in
    • Entries feed
    • Comments feed
    • WordPress.org
    ©2026 The Renaissance Raven | Powered by WordPress and Superb Themes!