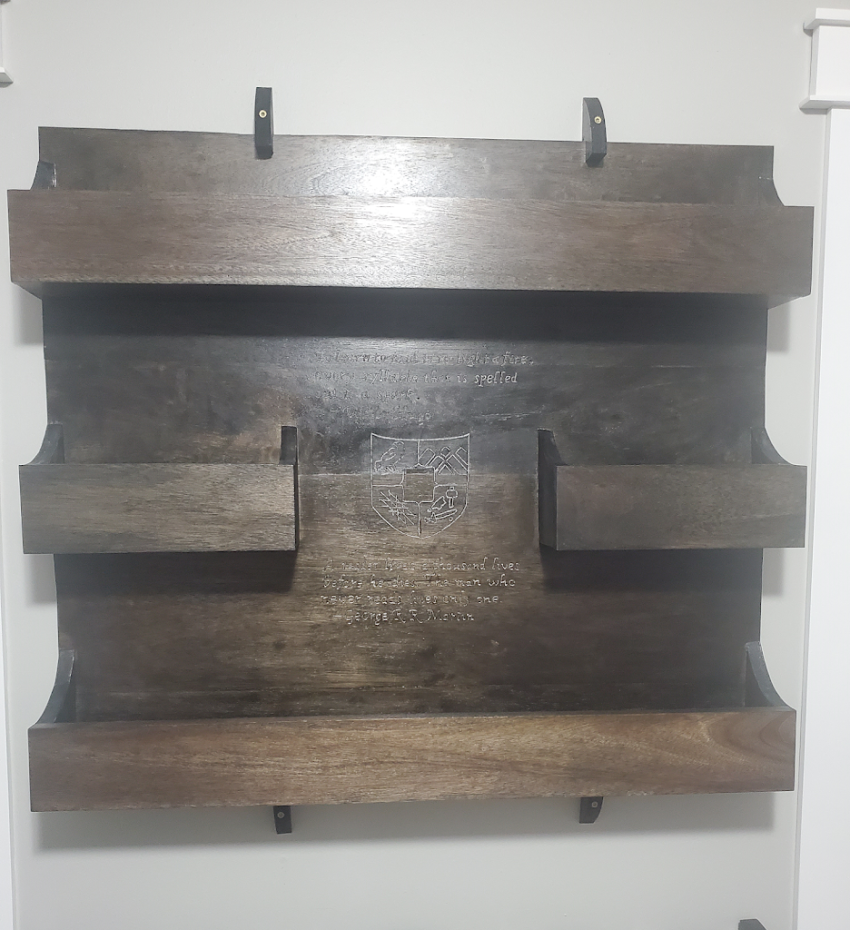
Creating a Wall Hung Mahogany Bookshelf with Engraving.
In this post I will show you how I created a wall hung bookshelf with engraved quotes and a crest.
Supplies:
- Mahogany wood (6ft long x 6in wide) x 6 = $80
- Wood Burning Tool: $30
- Glue/Stain/Paint: $10
- Wood Dowels: $5
- Total: $125
Step 1a: Cut wood to get 6, 6″ planks, to desired width (32″ for our project). For joining, I decided to go with dowels for a hardware less look, you are free to chose other methods. To line up the dowels I would line up two boards and draw a single line between them, see pic 1 below (ignore the already cut holes), then I would drill holes for the wood dowels with a drill press to ensure they are straight. Once they were cut proceed to place glue on the dowels and the board for joining.
Step 1b: Proceed to clamp boards together, and repeat for each pair of boards. Then proceed to repeat this method to join the three pairs together. It would be possible to glue all 6 together at once, but I did not trust myself to have perfect cuts across six pieces for one gluing step. Additionally on picture 4 below you will notice boards on running perpendicular on the edges… I found this was absolutely necessary because the boards well try to curve into an arc with only the clamps across the piece, this step kept all the pieces in-plane.
Step 2: For the edges of the bookshelf shelves, I wanted to add some flair by cutting the edges into arcs. To do this, I did some rough cuts with a miter saw to get the rough shape, then traced an arc and cut it with a jig-saw.
Step 3: Now building the top and bottom shelf (warning: the method I used for the sides I ended up regretting and used a different method for the small shelves, essentially for the large shelves the bottom piece is visible from the side, however, I hid the bottom piece on the smaller shelves. Look at both steps first to determine the style you want!). There are four pieces we have to build, remember the back is already build as the large board we made earlier, so we just need the front piece, two sides, and the base. For dimensions, I made the base board 3.5 inches wide and the front board 5 inches tall. For joining I once again used dowels for fastener-less design.
Step 4: Creating the two smaller shelves, this time with longer side pieces to cover the base piece.
Step 5: Dry fitted all pieces to ensure I like the final layout. I did not take a separate picture of this for some reason, but I designed some mounting hardware to keep from screwing the bookshelf directly into the wall itself. Hopefully the paint image can suffice below.
Step 6: Satisfied with the layout, I then proceeded to screw (yes, screw because these will be non-visible) the shelves in from the back. In the pictures you can see the strategy I used to ensure I was drilling straight into the pieces as you are kind of blind from the back.
Step 7: Stain wood and then top coat now if this is your final product if you do not wish to engrave. Congrats you have already a very nice bookshelf!
Step 8: Now the fun part, wood burning. I would recommend that if you just bought a wood burner that you do some practice burns. I did a couple practice pieces on the back of the shelf and now it will serve as a funny easter egg once we move the bookshelf in future. For the qoutes I would recommend using tape to keep your spacing level and consistent. Then proceed to just start burning the letters in. For the burning step, I ended up partially burning, partially engraving as I used some force to dig the tip into the wood, giving it more of 3d feel. I also created a family crest which I accomplished by placing tape and then drawing on the surface with a pen. I was able to then burn straight through the tape.
Step 9: Optional, but we decided to add metallic silver paint into the letters to increase the contrast of the engravings. This really helps with trying to read it from a distance or weird lighting:
Step 10: You are done! I ended up using four of the mounting pieces from step 5 picture 2 to screw into studs and hold securely in place. You can see the final product again at the beginning of this post.


